
BorderMaker

BorderMaker is a Dutch Freeware tool to add borders, text and water brands in digital photo’s.
The sole programmer of this application first made this tool for himself, because he needed an easy to use tool to add borders and text to a great number of photo’s. Once he had made this tool he realized that probably many other people would also like to use it. Therefor he decided to make it publicly available as freeware. This generated a lot of positive reaction which encouraged him to continue development of this tool. Because of all the features he added to this tool the name BorderMaker does not cover all it’s functionalities, but he kept the name since it is best known by it.
With BorderMaker you can add text, water brands and borders to a batch of photo’s at the same time. Some people, however, only use this tool to convert images to another format or to rotate a batch of photo’s.
BorderMaker was written in Java so you will need to install a Java Runtime Environment. Many people already have. On his website you can download a Windows version or a platform independed jar. Here you will also find instructions on how to install it. I installed it on my Ubuntu 8.04 LTS (amd64) machine. After download and unzipping I had to run bordermaker.bat. This generated an error, but a icon popped up on my desktop. Double-clicking this icon would start the application. I removed the icon from my desktop, but first I added it to my Gnome Menu. I don’t like to have icons on my desktop.
After starting the application it was quite easy to get familiar with this tool. In the main screen you can see 4 tabs on the bottom. These are text, borders, watermark and settings.
In the text tab you can click on the + to add a border. Another window will open. Here you can set the configuration of the text. The font, font-size, rotation, x and y-offset and of course the text itself. You change any configuration later by clicking the edit ‘pencil’ just below the +. The same principal goes for the watermarks, borders and settings.
You cannot make a watermark in the watermark tab. You will need to have an image already made which you want to use as your watermark. In the watermark tab you can only add this image as a watermark.
The settings tab enables you to set a few options for the output image when saving.
Under the border tab you can add a border and set the thickness and width of the border. You can also round the corners and choose a blending mode for the border frame. So get creative!
BorderMaker will let you view the EXIF data of an image, but you can’t change it.
Above all the tabs you can enter a source and a destination directory.
My opinion:
Bordermaker is an easy to use program and you can spice up some of your favorite images. Of course you can also do this in The GIMP, but this tool makes it so much easier. Check out www.bordermaker.nl to see some examples.
Pro’s:
- Easy to use.
- Nice options, you can really make nice pictures even nicer.
Cons:
- You may expect a lot of quality loss in your pictures when resizing.
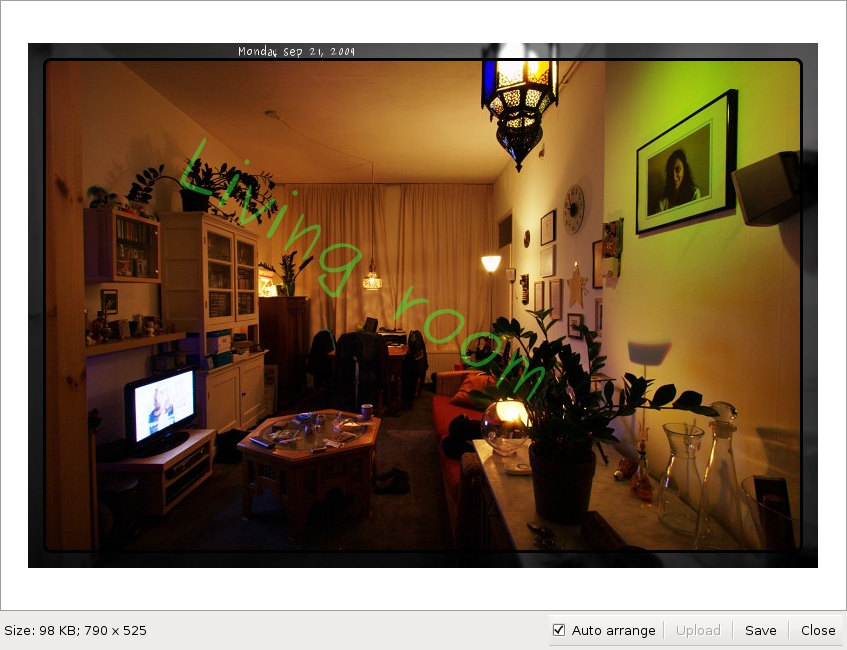
- The preview screen does not correctly show the outcome. Borders and text sizes may greatly differ from the preview.
- When selecting a source and a destination directory I had difficulty in finding my directories, because the weren’t shown in any logical order. Neither in alphabetical nor in timestamp order.
Professional photographers do not use this application
Screenshots:
(Click to enlarge, opens in new window)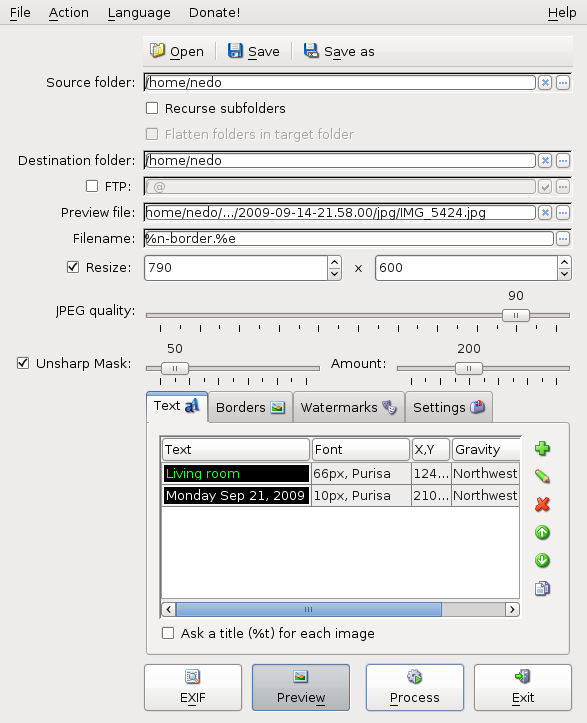
 Check out the
  When using the GIMP you have many possibilities. This can sometimes be very time consuming. You can use the build-in scripts to speed up the process. And you can extend the GIMP with the